Beeswax wraps
I have been making and using beeswax wraps for about a year now. Reducing plastic in our lives is so important. Plastic never goes away, and it is really worrying to think about that fact. Micro-beads of plastic are showing up in the fish we eat, and the only way we can stop this occurring is to STOP USING PLASTIC. One way is to use beeswax wraps instead of cling-wrap. Choose pretty 100% cotton fabric, and cut it into the sizes you desire. You can pink the edges, or sew with a three point zig zag as I do.


I buy my beeswax locally from a dear friend who sells honey, and I love the fact that it is a little bit rustic, and even sometimes has the odd little bits of unknown objects in it! I used to grate it but find it is easier to take a large knife and just shave pieces off it. If you get natural beeswax like this, then I would suggest you select fabric that does not have a lot of white background, as the wax tends to yellow it. You can buy beeswax pellets that are white from echo warehouse. https://ecowarehouse.com.au/products/beeswax100purerefinedpelletsper100g?utm_medium=cpc&utm_source=google&utm_campaign=Google%20Shopping&gclid=Cj0KCQjw2PP1BRCiARIsAEqv-pRYGNQC3Hp9Y5Dts21Xjm7v2qaPo8cshFI4IPhgkTqNMhCiq3aqAXkaAmO9EALw_wcB
The other product you are going to need is pine rosin, this is used to create the tackiness. You need twice as much beeswax by weight as pine rosin.
https://ecowarehouse.com.au/products/colophonypinerosinpineresinper100g?_pos=1&_sid=9dc273c15&_ss=r

These need to be placed into a double boiler, or a bowl on top of a pot containing water. The water should not touch the bottom of the bowl, but make sure you have enough water that the pot does not boil dry. Add jojoba oil or coconut oil, this keeps the wraps a little more pliable.
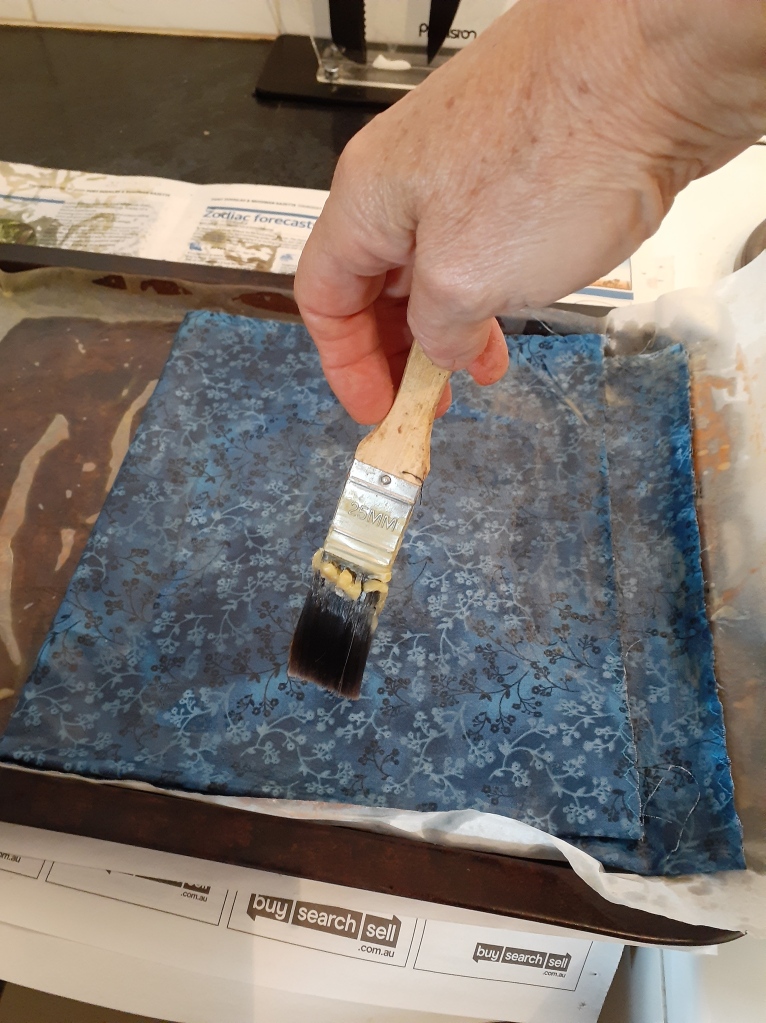
Once the mixture has completely dissolved ( the pine rosin takes much longer than the beeswax) you need to paint the mixture onto the prepared fabric. I put the fabric on a baking tray covered with wax wrap, for larger wraps the material can be doubled over. Then I pop the tray into the oven, set on low or 100*C for a few minutes. Take it out, and check that all the fabric is evenly coated. When well coated, lift the wrap up and gently wave it around until it starts to dry. the wrap can then be place on another sheet of wax wrap to harden and dry.
You have just completed your first beeswax wrap.


Lovely that you are making them yourselves and using local beeswax. Have a good week. Kathy
ReplyDeleteIt is!
DeleteWe had a workshop on this a while back. The wraps are so easy to make I must say.
ReplyDelete